Page 1 of 2 12 LastLast
Results 1 to 15 of 24

Thread: How To Sign Unsign App

  1. #1
    GsmIndia Editor Sr. Qims's Avatar
    Join Date
    Apr 2007
    Age
    47
    Posts
    2,045

    Default How To Sign Unsign App

    Full Guidance and supported Applications are uploaded.
    Please do not ask me to "HOW TO SIGN?"
    I does What i can do for you.
    so if any of members start to sing an apps must be appreciated.
    Best Of Luck
    QimS


    How To Sign Unsign Applications......!!!

    IMPORTANT NOTE: If you get a date or expiration error when trying to install an app that you dev-signed, make sure that the date format on your device (Tools -> Settings -> Date and Time -> Date format) is "dd mm yyyy"!

    More and more developers are openly providing unsigned beta applications on their sites. Examples are rotateMe, TaskSpy, and of course FExplorer.

    DZed posted an incredible guide over on the Go Symbian Forum teaching the masses how to sign an unsigned SIS file. As most of you know,
    S60 3rd apps must be signed in order to be installed on a device.

    Despite this guide, many people are still having troubles when attempting to sign a sis file. As such, I've compiled a slightly ammended guide that should clear up all of the question marks with regards to Symbian signing. Of course, all credit goes to DZed and Team 3G365...

    Note: In this guide I will be signing an app called "xyz" as an example. When you sign a real app, simply substitute "xyz" with the actual app name.


    TOOLS

    1. SignSIS Files

    2. Register an account on
    Code:

    http://www.symbiansigned.com

    3. DevCertRequest Tool

    3.This one is vital:
    Code:

    https://www.symbiansigned.com/DevCer..._2006_v2.0.exe

    GUIDE

    1. Create a new folder on your desktop containing the unsigned SIS and the two files from signsis_files.zip.


    2. Open the DevCertRequest tool that you downloaded and installed as per item 3 above under Tools.

    You must now create a name and an output directory for the cert request you will be creating. Give it any name and choose the folder that you created in step 1 for the output directory. Then hit next.


    3. On the next screen, check No. Then next to "Private key file" browse to the folder you created in step 1 and give your key file the same name you've been using. Then click on Open.


    4. Make the password 0123456 and then re-enter it.


    5. Populate the required fields on the next screen with any data and then click next.


    6. Now you will have to add your device's IMEI number to the cert. Follow the guide in the image below and if you do not know your device's IMEI, enter *#06# on your device in the standby screen.


    7. Highlight all of the "Application Capabilities" and click Add.


    8. On the final screen simply click Finish.


    9. You will now see four new files in the folder you created in step 1.


    Cont....

    Last edited by Qims; 02-03-2008 at 03:06 AM.

  2. #2
    GsmIndia Editor Sr. Qims's Avatar
    Join Date
    Apr 2007
    Age
    47
    Posts
    2,045

    Default

    10. Now go to www.symbiansigned.com and log in.


    11. Click on the "My Symbian Signed" tab, then click on "Developer Certificates".


    12. Click "Request" under "Developer Certificates". Then browse to the CSR file in the folder you created in step 1.


    Once the CSR is uploaded, simply click on "My DevCerts" in the menu on the left and you will see a link to download your newly created certificate (CER file). Save it in the folder you created in step 1.


    You now have everything you need to sign your SIS file.

    Open auto_signsis.bat in MS Notepad. You will see that is currently contains the following:


    Code:

    signsis xyz.sis xyz_signed.sis xyz.cer xyz.key 12345

    Replace every "xyz" as appropriate. So if your unsigned file (and all of the files you named above) is called "MyApp", then the text in the batch file should read:

    Code:

    signsis MyApp.sis MyApp_signed.sis MyApp.cer MyApp.key 12345

    Save the batch file (choose Save, not Save As) and exit.

    Now just go back to the folder you created in step 1 and double-click on auto_signsis.bat. Your newly signed SIS file will be created in the same folder for you to install and enjoy.


    Signing apps available, links below :-

    http://din-tech.blogspot.com/2008/01...plication.html


    There is also a slightly different guide that works for most people on:

    Code:

    http://www.mobile9.com/invboard/inde...howtopic=37281


    Last edited by Qims; 01-03-2008 at 05:57 PM.

  3. #3
    GsmIndia.in Active Teen 3gmobile's Avatar
    Join Date
    Mar 2007
    Posts
    128

    Default

    i will try soon and post u the result ... goood luck

  4. #4
    GsmIndia Editor Sr. Qims's Avatar
    Join Date
    Apr 2007
    Age
    47
    Posts
    2,045

    Default

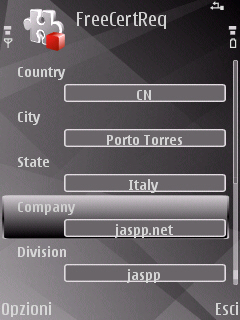
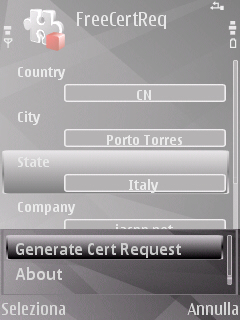
    DevReq, create csr files on your mobile! -
    As title says, DevReq allow user to create csr files directly from a mobile phone. Useful for all people using a linux or mac, or simply for people without a pc at the moment...


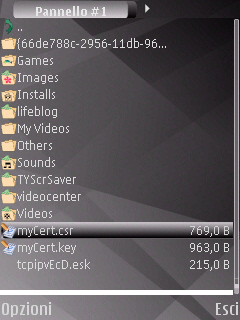
    Fill all fields and select options - generate CertRequest, and csr and key files will be created on c:.


    App created by OPDA team

    for those one who are confused:
    this application create a "csr" file (certificate request), not a "cer" file needed for sign application.
    it's the file you need to upload to simbyansigned so you can get the certificate necessary for signing.


  5. #5
    GsmIndia Editor Sr. Qims's Avatar
    Join Date
    Apr 2007
    Age
    47
    Posts
    2,045

    Default

    [PC]SIS Signer 1.3 -


    This little app helps sign file.
    App support drag"n"drop and you can associate sis files with this app and when you open sis app run's and you need only press sign and app will sign file.

    Update!Added uninstaller...

  6. #6
    GsmIndia Editor Sr. Qims's Avatar
    Join Date
    Apr 2007
    Age
    47
    Posts
    2,045

    Default


    [PC]BiNPDA Presents...

    SignSiS v0.7

    Default BiN Password key file : 0000

    Attached in the zip file:

    If you are using a different private key e.g sultan key,
    just type in your key pwd and attached this file (SignSiS) together
    with your private.key files, certificate and unsigned file.

  7. #7
    GsmIndia Editor Sr. Qims's Avatar
    Join Date
    Apr 2007
    Age
    47
    Posts
    2,045

    Default

    SignMe! 1.08 (beta) for Windows

    (Updated on 28/1/2008)

    SignMe! is a small piece of software designed to make the whole sis files signing process a bit easier.
    Simply right-click on any .sis file, chose "SignMe!" and that's it.

    (To make things clear - you'll still need to sign up at SymbianSigned in order to have both .cer and .key files.
    You'll be prompt for them and the certificate password the first time you'll run the application.)


    New in version 1.07 - Batch signing of files!


    That's all folks. Enjoy the show.


    To do list:

    1. Improve the Installer.
    2. Add the right click menu command even if Nokia's PC Suite is not installed.
    3. Fix the "runtime error 75" when a user don't have administrator privileges.
    4. Add File Delete to the new Multi-Sign tool.


    Download SignMe! (beta) from here (version 1.08)

    Please notice - This beta version (tested only on Windows XP so far) is intended for testing purposes and provided as is.
    (So don't come and blame me if your computer will explode or something like that...)

    link:


    Code:

    http://rapidshare.com/files/89969053...Beta_-_1.8.zip

    help:

    http://www.barakharel.com/signme/

  8. #8
    GsmIndia Editor Sr. Qims's Avatar
    Join Date
    Apr 2007
    Age
    47
    Posts
    2,045

    Default

    [PC]the best signing utility!!


    What's new:
    1. New design.
    2. All came more easy. Tou need just place your key file and certificate to C:\Signer\cert\ folder and run the programmm.
    3. Automatic load of list fo unsigned apps.
    4. To delete files from list use doubleclick.
    5. Unsigned files must be in C:\Signer\Unsigned_Programs\
    6. Refresf button.
    7. Smaller size of the utility.
    9. Faster.
    10. Progress bar - you need just wait till programm informs you when all done.
    11. As usual, you can select and use different certificate and mykey file.

    Recomendations:
    1. Place your certificate and mykey.key file to C:\Signer\cert\
    2. Default password 12345678. If you have different password use button "Password" to enter it.


  9. #9
    GsmIndia Editor Sr. Qims's Avatar
    Join Date
    Apr 2007
    Age
    47
    Posts
    2,045

    Default

    This is tutorial for FExplorer and it works with all other unsigned programs...
    Just try it. You can find all the files needed here in (signing_files.zip)

  10. #10
    GsmIndia Editor Sr. Qims's Avatar
    Join Date
    Apr 2007
    Age
    47
    Posts
    2,045

    Default

    [PC]Xpress Signer:: -
    This utility designed for express software Symbian signing.


    FULL ENGLISH TRANSLATION

    All you need is:
    1. Xpress Signer (mykey.key file in program folder)
    2. Developer Certificate Request programm to get your certificate
    3. and Xpress Signer again to Sign the Software you need!!


    Instruction:
    0. Install XpressSigner
    1. Make request for certificate in Developer Certificate Request programm using mykey.key file in XpressSigner folder.
    2. Receive your certificate.
    3. Run XpressSigner
    4. Select the key file (*.key)
    5. Select the certificate file (*.cer)
    5. Select rhe files to be signed
    6. Enter the password used in Developer Certificate Request
    7. Check the list of files to be signed
    8. Press GO! button.

  11. #11
    GsmIndia Editor Sr. Qims's Avatar
    Join Date
    Apr 2007
    Age
    47
    Posts
    2,045

    Default

    Yamgui 2.00 [s60v3 Support][Best Sis/sisx Creator]

    Many Thanx to The Wiep and Jari
    Yo can also sign sis and sisx files
    YAMGui Plus V2.0.0 Beta, with support for 3rd edition


    Main features (Advanced Interface):
    * - Create SIS Files -
    * create sis files
    * (auto)grab UID from .sis and .app
    * grab app name and version info from .sis
    * add (multiple) popup from textfile or type new one
    * set type of popup
    * choose position of popup (by drag/drop)
    * preview popup
    * embed (multiple) sis in sis
    * add (multiple) Options
    * add (multiple) Conditions
    * add FILERUN
    * add DELETE
    * change temppath that is used
    * set default directories to easy the browsing
    * save as .pkg file to process later
    * process .pkg file
    * - Unpack/Rebuild SIS -
    * rebuild sis files, good for themes when you get Series60SkinSupport error
    * files are rebuilt with same name, UID and target platform Series 60 v0.9 (all)

    Conditions:


    Option to choose Simple Interface:


    SIS Info/Extract features:

    * view all info from sis file
    * view appname for all languages
    * view all languages
    * view behavior of sis files with If, Else and Options
    * extract all files
    * choice to extract all languages or only one
    * save the listing in txt file


    Preview theme:
    * preview a theme is sis format
    * ability to show icons
    * ability to save preview images


    Settings:

    * you can set default paths for easy access
    * you can change the program language to all non unicode languages, currently only english is provided


    Known issues/To Do:

    * when extracting sis files with If, Else and Options all files are extracted overwriting previous ones
    * at this point the list shows the sis file as it is constructed (recursive)
    * enhance "translation" of If, Else and Options for easier understanding
    * some themes might not show correctly (need .skn format description)


    http://rapidshare.com/files/74470729...etupV2.0.0.rar

  12. #12
    GsmIndia Editor Sr. Qims's Avatar
    Join Date
    Apr 2007
    Age
    47
    Posts
    2,045

    Default


    PhoNetInfo - OPEN SIGNED ONLINE

    Symbian S60 3rd edition applications must be signed in order to be installed on a device due to platform security restrictions. The following tutorial will show you how you can sign the latest release of PhoNetInfo by yourselve as it isn't yet officially signed by Symbian Ltd. External link resp. Symbian Signed External link. The signing method used in this tutorial is called "Open Signed Online".

    Prerequisites:

    1. Latest PhoNetInfo developer version for users of Open Signed Online.
    2. Make sure that the date format on your device ("Tools | Settings | Date and Time | Date format") is set to "dd mm yyyy". Otherwise you may get a date or expiration error when trying to install PhoNetInfo.
    3. Make sure that you have changed the field "Software Installation" from "Signed Only" to "All" under "Options | Settings | Programs | App Manager" of your device.


    Procedure:
    Step 1: Go to the Symbian Signed website and access the service


    1. Go to Symbian Signed External link (http://www.symbiansigned.com/)
    2. At the top left of the website click the link under the topic area "Open Signed Online" to go to the online submission page.
    oso_step_1


    3. Enter the requested information in the online form, including your device IMEI (enter *#06# on your device in the standby screen) and a valid email address.
    4. On your local machine, navigate to the PhoNetInfo developer version SIS file you are submitting for signing.
    5. Select the following capabilities required by PhoNetInfo:
    * Location
    * LocalServices
    * NetworkServices
    * PowerMgmt
    * ReadDeviceData
    * ReadUserData
    ...or simply click on [Select all].

    6. Enter the security code displayed and prompted for.
    7. Click to view the legal agreement.
    8. Click on "Close" after you have read the legal agreement.
    9. Click on the "Submit" button to complete the process.
    oso_step_2-9


    Step 3: Access your email account and confirm your email address
    An email will be sent to you containing a link to confirm your email address (this may take several minutes). Click the link to confirm.


    Step 4: Download your signed application
    A second email will be sent to you containing a link to your developer certificate signed PhoNetInfo SIS file (this may take several minutes). Click the link to download PhoNetInfo (Note: The download is possible for a limited time only).


    MORE INFO:
    http://www.patrickfrei.ch/phonetinfo..._sign_oso.html

  13. #13
    GsmIndia.in Board Browser
    Join Date
    Jan 2008
    Age
    44
    Posts
    7

    Post certificate error

    Dear,

    i have problem with installing webgate advance device lock. when i install it then this gives a message of certificate error contact supplier. plz do somthing for me. i want a webgate advance device lock for my nokia N95

  14. #14
    GsmIndia Editor Sr. Qims's Avatar
    Join Date
    Apr 2007
    Age
    47
    Posts
    2,045

    Default

    Interpreting Signing Error Messages in S60 3rd Edition


    Message: Certificate error. Contact the application supplier.

    Hint: You may have tried installing unsigned application. Note that signing is mandatory S60 3rd Edition. You can use self-signed certificate or developer certificate from Symbian Signed to sign your application.


    Message: Unable to install. Constrained by the certificate.

    Hint: This message pops up when you attempt to install developer certificate in the unsupported device. The developer certificate from Symbian Signed can only be used in a limited number of devices. Remember that you have to send your IMEIs to Symbian Signed when requesting certificate. You cannot use the certificate in other devices that is not in your IMEIs list.

    Message: Required application access not granted.


    Hint: Check that your certificate can be used to sign all capabilities needed by your application. For example, if you use self-signed certificate, you can only sign basic set capabilities, i.e. NetworkServices, ReadUserData, WriteUserData, LocalServices and UserEnvironment. If your application requires one of the extended capabilities, for example SwEvent, you cannot sign it with self-signed certificate. In this case, apply for developer certificates from Symbian Signed.

    Message: Unable to install a protected application from an untrusted supplier.

    Hint: If you use self-signed certificate, make sure that your application uses unprotected UID, i.e. 0xA0000000 - 0xAFFFFFFF. If you use protected UID (0x20000000 - 0x2FFFFFFF) or legacy UID (0x10000000 - 0x1FFFFFFF), you will get this message.

    Message: Unable to install.

    Hint: This message may come up when your installation file (.sis/.sisx) copies files to other application's private folder, i.e. \private\uid. Note that Symbian 9 introduces data caging concept, it means you don't have access to other application's private folder.

    In case of expired certificate...
    Do this...
    Set the phone date back by 7-8months...
    Than install the app...
    After doing that reset the date back to routine...

    If still the problem is present...
    In that case your cert has expired...
    Get a new cert from symbian signed...
    As the cert got from symbiansigned are valid only for 6months...

  15. #15
    GsmIndia Editor Sr. Qims's Avatar
    Join Date
    Apr 2007
    Age
    47
    Posts
    2,045

    Default

    Bypass Symbian Signed & Install UnSigned SISXJ2ME Midlets on Nokia S60 v3

    Here is some breaking news for Nokia S60 mobile users. The very much frustrating Symbian Signed security platform v9.2 has been exposed to hacks. No longer do you need to use tools such as SignSIS & DevCertRequestControl to get a certificate for installing applications. Users can now bypass the Symbian Signed certification check and install any unsigned or self-signed applications or software.

    When installing native Symbian OS packages (.SISX files) onto a Nokia S60 mobile device, the code performing the installation (the Software Installer, sometimes referred to as SWI) first reads the settings in a policy file in the ROM (swipolicy.ini) to determine how the installation should proceed. Swipolicy.ini is configured by a device manufacturer prior to device shipping. On a phone, swipolicy.ini is located in z:\system\data\.

    This hack involves modifying the swipolicy.ini in the ROM image when you do a firmware upgrade using a HEX Editor and then re-flashing the device with the altered permissions. You can read all about it at the Symbaali blog.

    Important Note: This hack is not for the faint hearted and is known to brick a few models that perform a CRC check. Anything that you do following the article below is at your own risk and responsibility.

    + First update your S60 mobile phone using the software update tool.

    + It will download the binary image to C:\Documents and Settings\All Users\Application Data\Nokia\Nokia Service Layer\A\nsl_service_module_00001\

    + Open the ROM image in a HEX editor such as WinHex

    + For Java J2ME midlets, look for the following text/string (can be found using search string midp2_rp.xpf near offset 0×2310000):

    # midp2_rp.xpf
    # Copyright (c) 2004-2005 By Symbian Software Ltd. All rights reserved.
    # This file defines one possible interpretation of the MIDP2 Security RP security policy,
    # but with a JTWIr1 compliant policy for untrusted MIDlet suites

    FormatVersion: 1.0

    # MIDlets in untrusted MIDlet suites need user permission before doing anything
    DomainBindings: [UNTRUSTED]

    FunctionGroupBinding: “Application Auto Invocation”
    Permission: User
    DefaultMode: Session
    MaximumMode: Session
    EndFunctionGroupBinding

    FunctionGroupBinding: “Landmark”
    Permission: User
    DefaultMode: Session
    MaximumMode: Session
    EndFunctionGroupBinding
    […]

    + Change MaximumMode field for each permission you want to add such as Application Auto Invocation, Landmark, Local Connectivity, Messaging, etc to Blanket. If you want, you can also change the DefaultMode to Blanket and save the image.

    + Now run the software update again and it should re-flash the S60 device with your new, unrestricted permissions. You can test if the hack was successful by installing a Java J2ME midlet. You should see more permission options in the application manager (Select the midlet and Click Open).

    + For Nokia S60 SISX files, locate the swipolicy.ini in the ROM image (can be found using search string UserCapabilities, near offset offset 28251550):

    AllowUnsigned = false
    MandatePolicies = false
    MandateCodeSigningExtension = false
    Oid = 1.2.3.4.5.6
    Oid = 2.3.4.5.6.7
    DRMEnabled = true
    DRMIntent = 3
    OcspMandatory = false
    OcspEnabled = true
    AllowGrantUserCapabilities = true
    AllowOrphanedOverwrite = true
    UserCapabilities = NetworkServices LocalServices ReadUserData WriteUserData UserEnvironment
    AllowPackagePropagate = true
    SISCompatibleIfNoTargetDevices = false
    RunWaitTimeoutSeconds = 600
    AllowRunOnInstallUninstall = false
    DeletePreinstalledFilesOnUninstall = true
    AlternativeCodeSigningOID = 1.3.6.1.4.1.94.1.49.1.2.2.1 1.3.6.1.4.1.94.1.49.1.2.2.5
    PhoneTsyName = phonetsy

    + Next you need to download a free dd tool for windows such as one from here

    + Then extract the original text using dd by running the following command:

    dd if=phonemodel.C01 of=filename.txt skip=28251550 bs=1 count=648

    + Remember to replace if, skip and count variables with the values of your own ROM image. The count variable is the size of the swipolicy.ini in your flash ROM image starting from AllowUnsigned till phonetsy.

    + Open the filename.txt and edit the UserCapabilities with

    AllFiles DiskAdmin NetworkServices LocalServices ReadUserData WriteUserData ReadDeviceData WriteDeviceData UserEnvironment PowerMgmt MultimediaDD TrustedUI ProtServ NetworkControl SwEvent Location SurroundingsDD CommDD

    As per one of the comments, you can also set UserCapabilities = All to include the full capability-set.

    Ensure that the swipolicy.ini fragment matches the original byte count size that you had earlier. If it is more in size, you may have to remove some non-important attribute such as Oid = 1.2.3.4.5.6 at your own risk to ensure that the byte count matches. Hint: check the size of filename.txt in Windows explorer before importing.

    + Import the filename.txt back into the ROM image by running the following command:

    dd if=filename.txt of=phonemodel.C01 seek=28251550 bs=1 count=648

    Again remember to replace the of, seek and count variables for your ROM.

    + Now re-flash your mobile phone with NSU as you did earlier. You will find more functionalities that you don’t even get with a developer certificate.

    After your phone is unlocked, you can add the AllFiles capability to Y-Browser that enables you to browse and view system and private files on your smartphone’s mobile file system.

Page 1 of 2 12 LastLast

Thread Information

Users Browsing this Thread

There are currently 1 users browsing this thread. (0 members and 1 guests)

Similar Threads

  1. 3230 keypad problem 5,7,number sign ang call
    By jvassdamulo in forum WD2
    Replies: 1
    Last Post: 05-01-2008, 05:13 PM

Tags for this Thread

Bookmarks

Posting Permissions

  • You may not post new threads
  • You may not post replies
  • You may not post attachments
  • You may not edit your posts
  •